When working on PHP projects and building them with PHP frameworks, managing your own packages on a self-hosted platform is essential. In this scenario, Satis is the ideal solution. It allows you to create your private Packagist instance using Composer, ensuring complete control over your dependencies and enabling seamless integration into your development workflow.
I. Overview of managing PHP project packages
Most PHP projects require vendor packages managed by the Packagist website. Installing them is made easy with the Composer tool, which is quite popular. This process is similar to using the npm tool for Node.js applications or the Maven tool for Java applications.
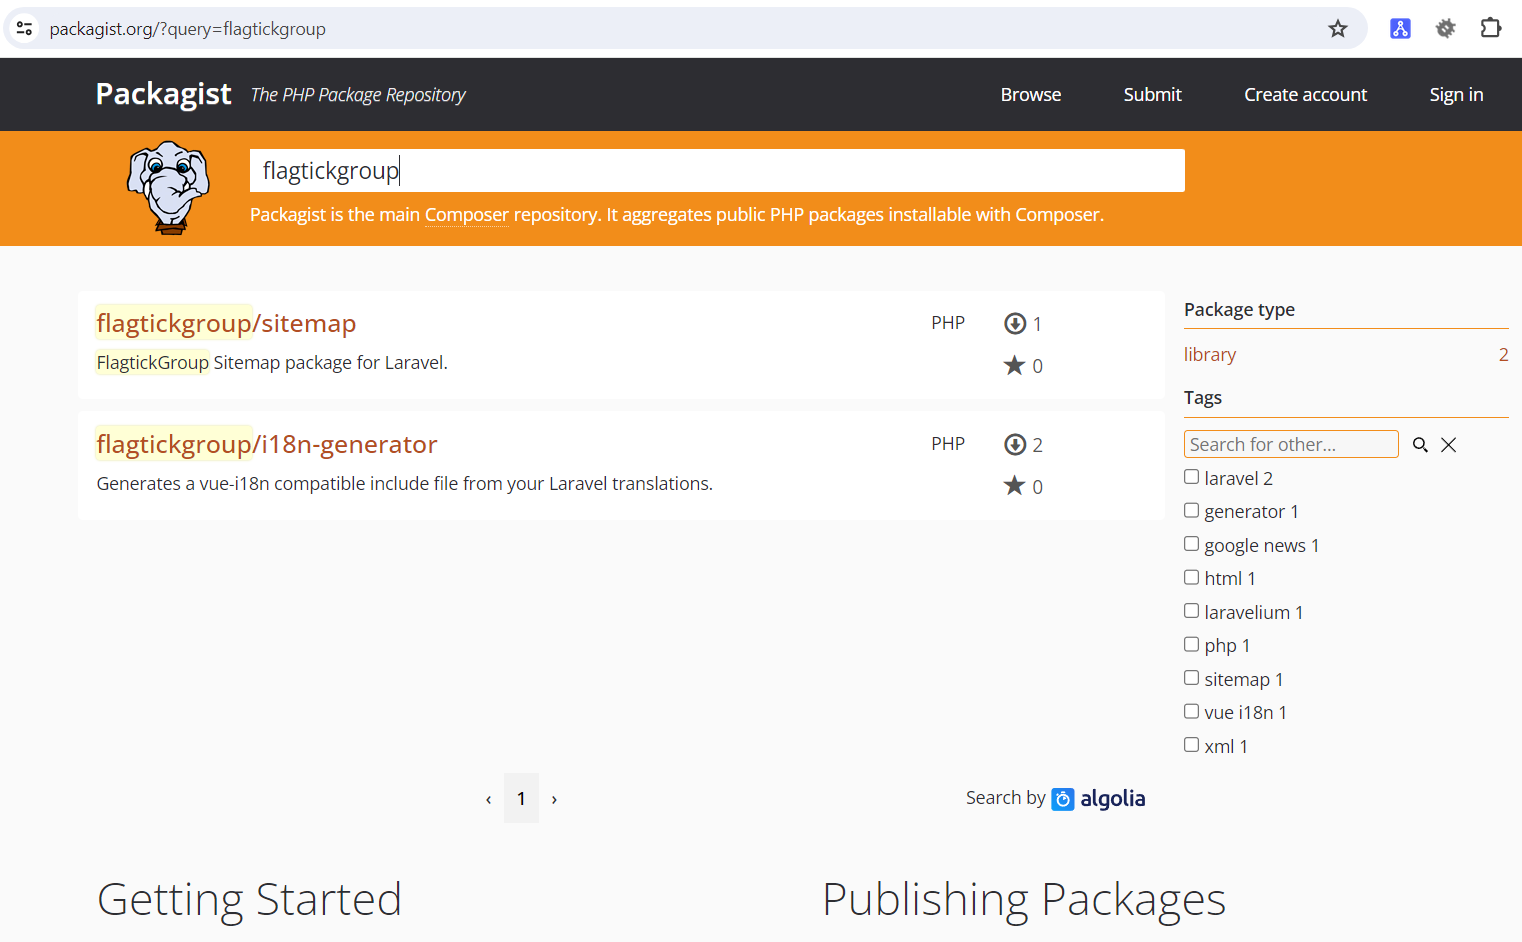
In this example, my organization, flagtickgroup, offers packages for projects on flagtickgroup.com, making development easier. So, developers can upload their packages to Packagist, get them with Composer, and smoothly add them to their PHP projects.

After logging into Packagist via GitHub association, you will see the `Submit` option. This option enables you to update your package on Packagist and link it to your GitHub repository, where you are the owner.
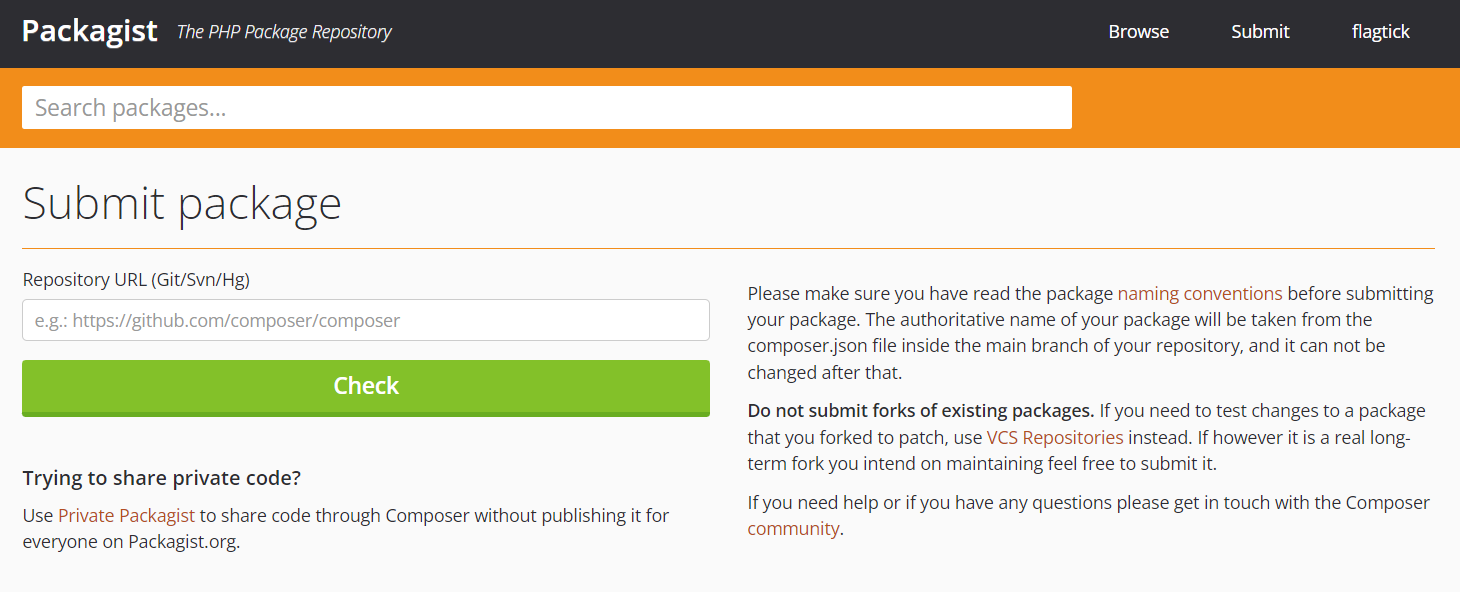
Within this interface, you will find the `Private Packagist` option, allowing you to keep your repository or package private and restricted to your organization's internal use. However, this feature comes with a trade-off—you'll need to pay for this option.
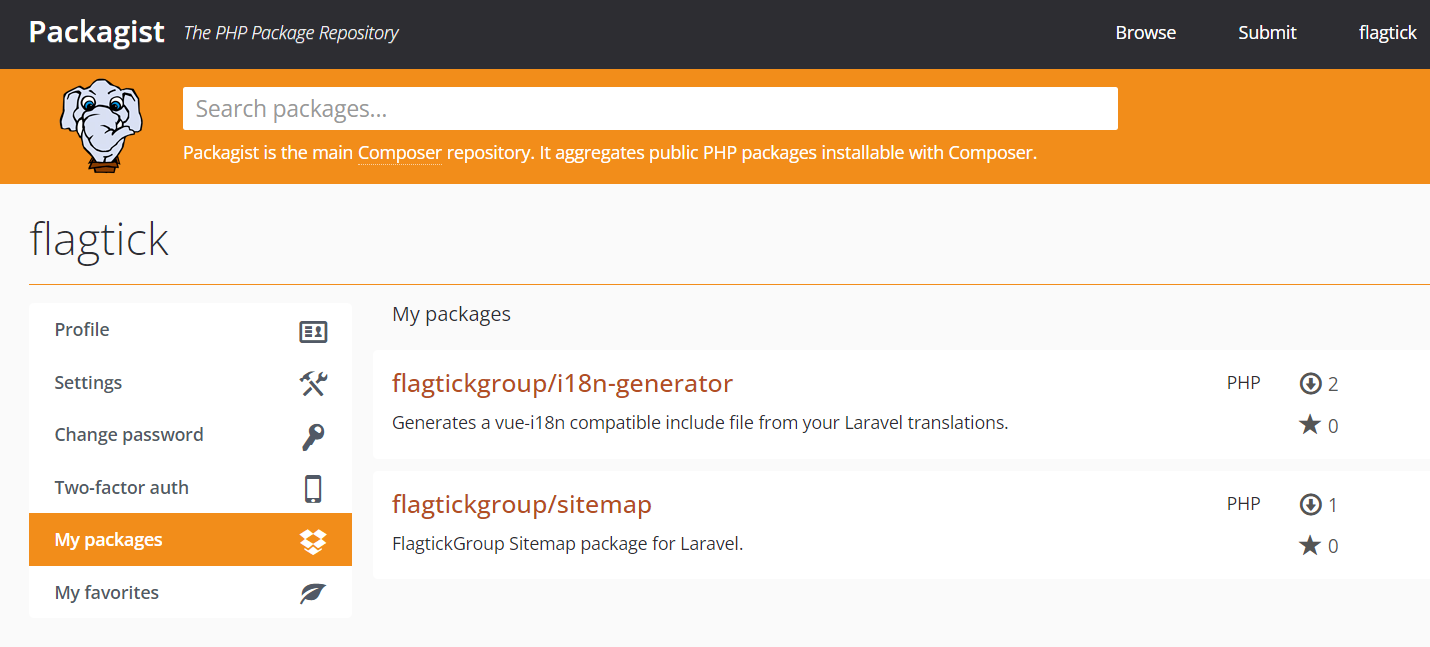
Navigate to `My packages` to view the packages you have uploaded to the Packagist website. These packages are publicly accessible, allowing other developers to download them.
In the following section, we will run Composer to install project, integrating Satis. Additionally, you can source your code from platforms like GitHub, GitLab, Bitbucket, or even your private VCS server.
II. Setting up Laravel with Integrated Satis
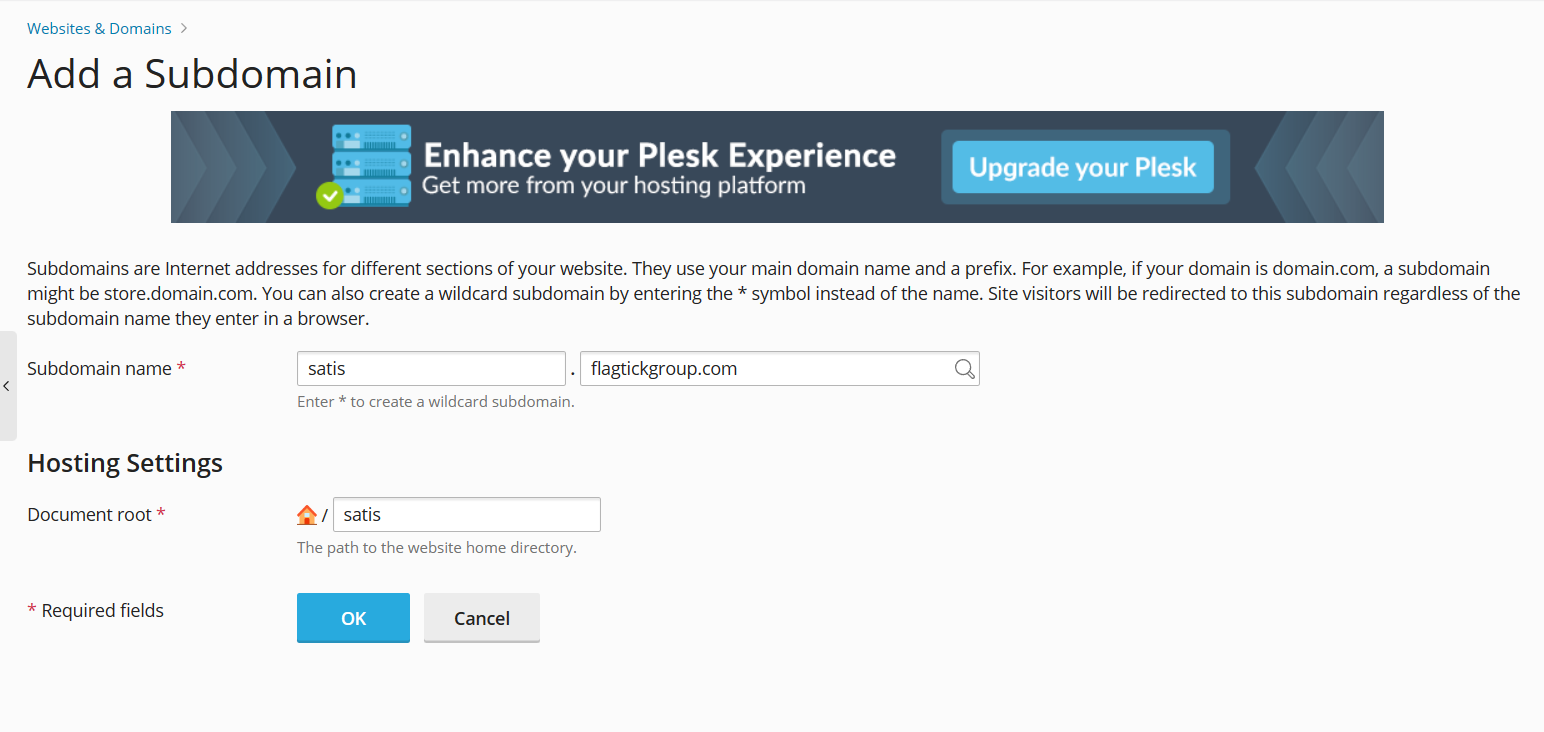
We will be running it on remote host instead of local host. Use the Plesk panel, we will manage the domain and subdomain and access the VPS to create folder named `satis` in /var/www/vhosts/flagtickgroup.com, which hosts many subdomains under the main domain flagtickgroup.com.
sudo mkdir /var/www/vhosts/flagtickgroup.com/satis
sudo chmod 777 /var/www/vhosts/flagtickgroup.com/satis
To set up the project, execute the following command:
composer create-project composer/satis --stability=dev --keep-vcs
The folder named `satis` will now be created within your project directory. Next, navigate to /var/www/vhosts/flagtickgroup.com/ and create `satis.json` file.
{
  "name": "Flagtick Group's Hub for PHP Packages",
  "homepage": "https://satis.flagtickgroup.com/",
  "repositories": [
    {
      "type": "vcs",
      "url": "https://github.com/flagtick/i18n-generator.git"
    },
	{
      "type": "vcs",
      "url": "https://github.com/flagtick/laravel-sitemap"
    }
  ],
  "require-all": true,
  "config": {
    "secure-http": true
  }
}
You can leverage the `url` field to point to your Version Control System (VCS) server, allowing you to add as many repositories as you need. In our example, we are using GitHub as our VCS.
"repositories": [
    {
      "type": "vcs",
      "url": "https://github.com/flagtick/i18n-generator.git"
    },
	{
      "type": "vcs",
      "url": "https://github.com/flagtick/laravel-sitemap"
    }
  ],
The `"require-all": true` setting in the `satis.json` file includes all branches by default. If you want only specific branches, specify them explicitly.
"require": {
  "flagtickgroup/sitemap": "dev-master",
  "flagtickgroup/sitemap": "v1.0.1",
  "flagtickgroup/sitemap": "dev-main"
}
You can view all specified branches by visiting the URL https://packagist.org/packages/flagtickgroup/sitemap.

When working on local machine, you should set `secure-http` to false instead of true for live secure server.
"secure-http": false
Once the `satis.json` configuration is complete, navigate to your project's root folder and execute the following command:
php bin\satis build satis.json web
For Linux:
php bin/satis build satis.json web
After the `web` folder is created and the index.html file appears, you can open this file in your browser to view how Satis displays all the repositories.

Let set up Satis locally and access it in your web browser, run the following command to launch the Satis web interface: php -S localhost:8001 -t web. Then, simply visit http://localhost:8001 in your web browser to access Satis.

III. Setting Up Subdomain On Web Hosting
Begin by setting up subdomain on your remote server. For instance, suppose our main domain is flagtickgroup.com and manage it using the Plesk control panel. Creating subdomain within this setup can be very easy.
Additionally, when your domain is connected to CDN layer (such as Cloudflare) before reaching the remote server, setting up A record for the CDN layer is necessary.
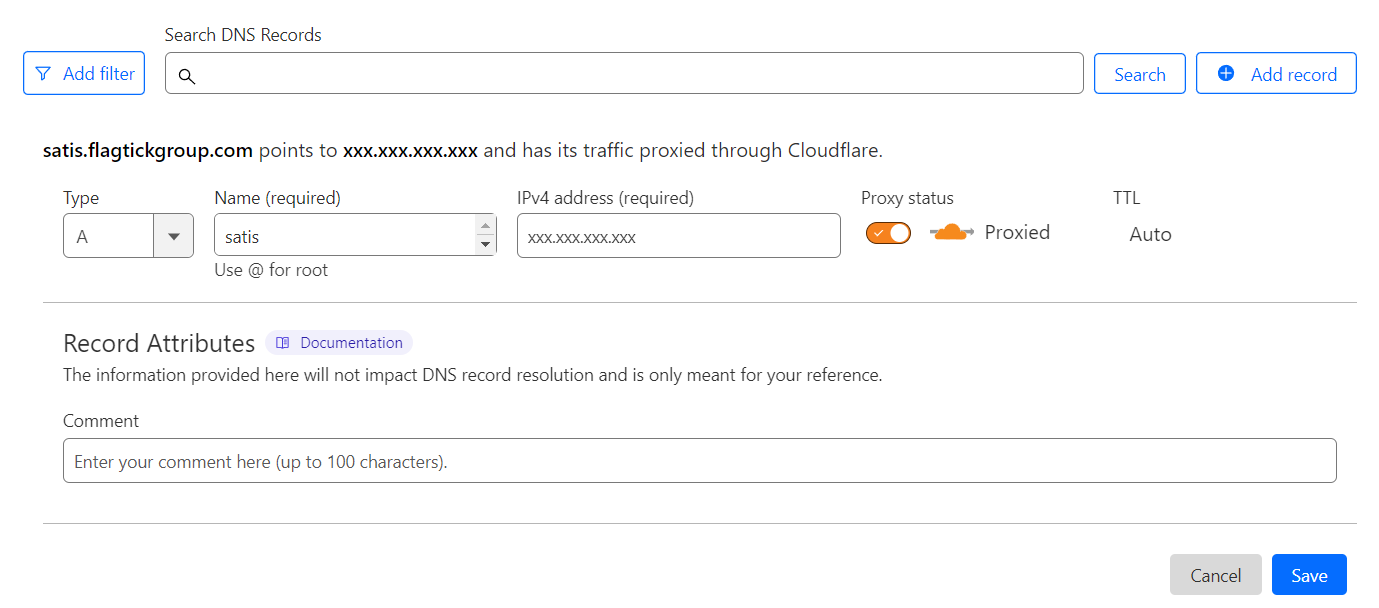
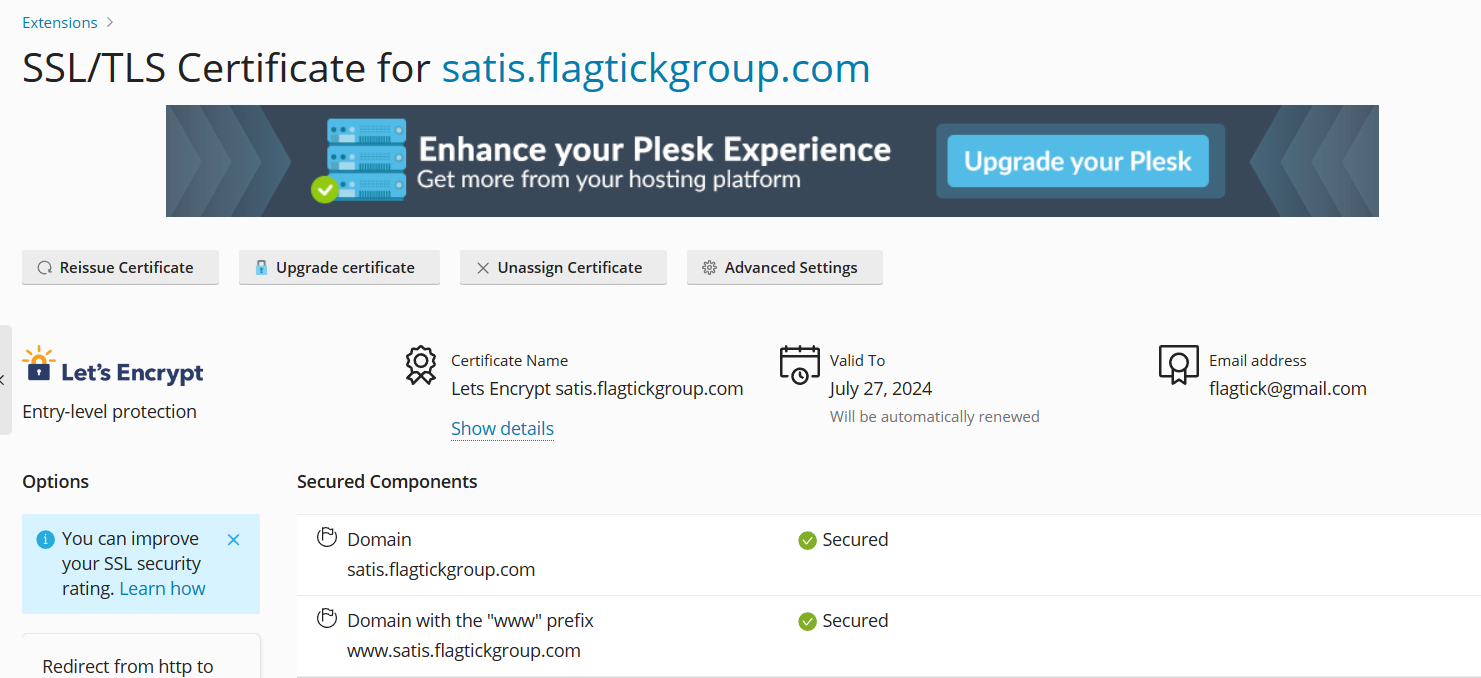
Additionally, you should enable SSL for this subdomain to mitigate the risk of encountering too many requests errors.
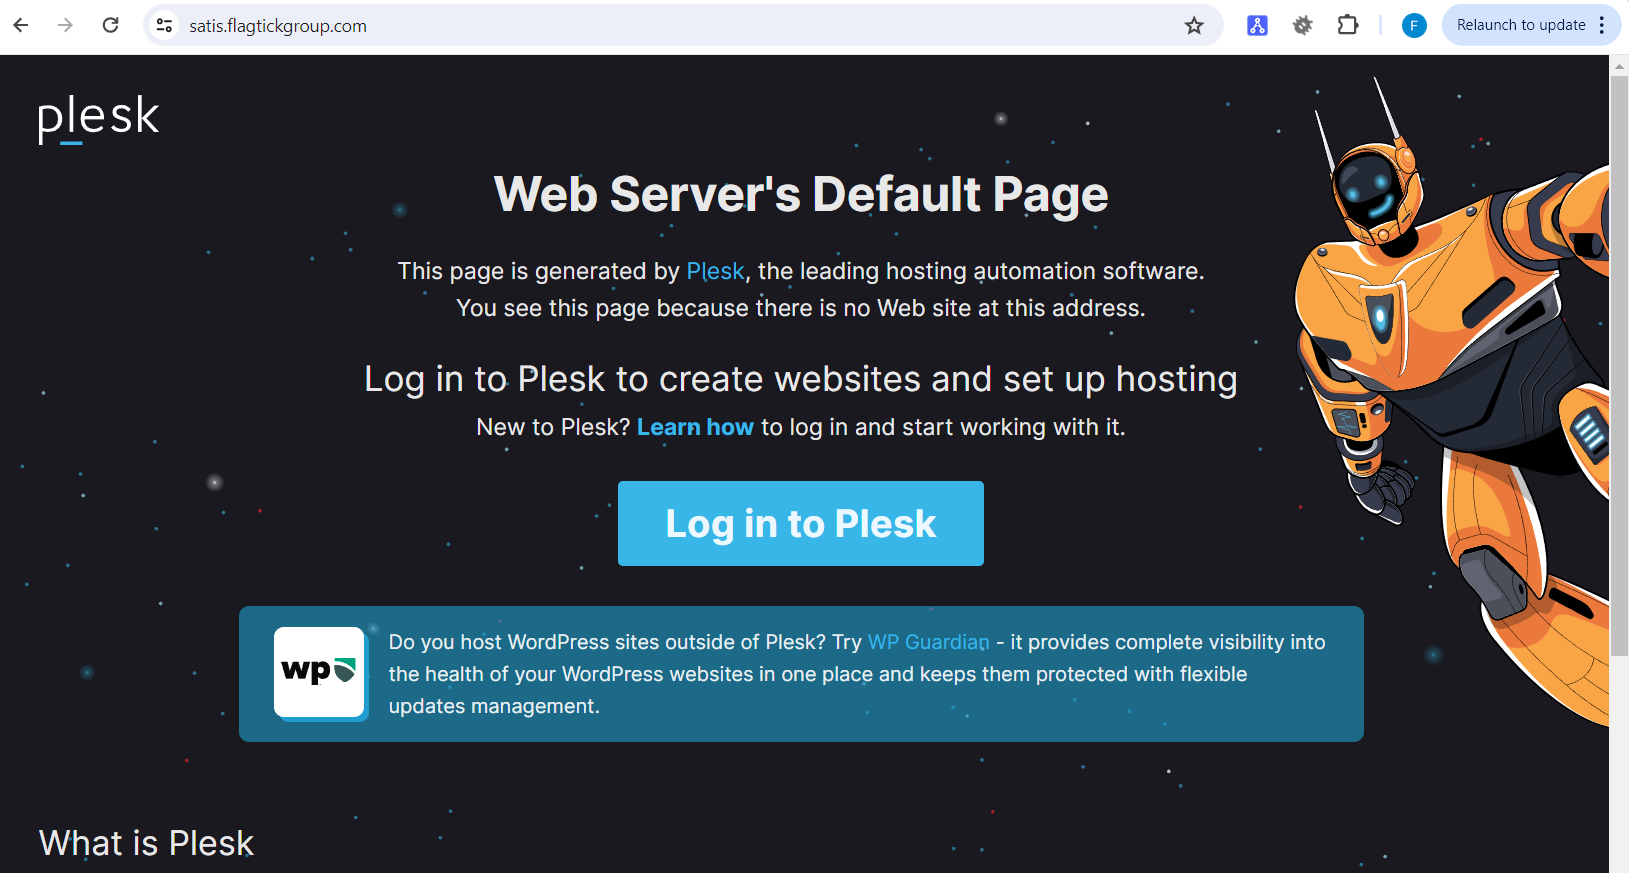
When you visit the URL https://satis.flagtickgroup.com/ in your browser, you will encounter the Web Server's Default Page.
The next step involves creating the `satis.flagtickgroup.com.conf` file in /etc/apache2/sites-available to navigate to the web folder.
/etc/apache2/sites-available$ sudo cp 000-default.conf satis.flagtickgroup.com.conf
» satis.flagtickgroup.com.conf
<VirtualHost *:80>

    ServerName redmine.flagtickgroup.com

    DocumentRoot /var/www/vhosts/flagtickgroup.com/satis/web

    <Directory /var/www/vhosts/flagtickgroup.com/satis/web>
        Options FollowSymLinks
        AllowOverride None
        Require all granted
    </Directory>

    ErrorLog ${APACHE_LOG_DIR}/redmine_error.log

    CustomLog ${APACHE_LOG_DIR}/redmine_access.log combined
</VirtualHost>
Activate the virtual host configuration and then restart Apache to apply the changes.
sudo a2ensite satis.flagtickgroup.com.conf
sudo systemctl reload apache2
sudo systemctl restart apache2
Let us review the satis.json file on the remote server to ensure that all repositories from GitHub are configured correctly.
/var/www/vhosts/flagtickgroup.com/satis$ cat satis.json
{
  "name": "Flagtick Group's Hub for PHP Packages",
  "homepage": "https://satis.flagtickgroup.com/",
  "repositories": [
    {
      "type": "vcs",
      "url": "https://github.com/flagtick/i18n-generator.git"
    },
    {
      "type": "vcs",
      "url": "https://github.com/flagtick/laravel-sitemap"
    }
  ],
  "require-all": true,
  "config": {
    "secure-http": true
  }
}
After running the command `php bin/satis build satis.json web` in Linux environment, you will find that the file index.html has been generated. Next, we will proceed to link it to subdomain in the Plesk panel to access the user interface.
/var/www/vhosts/flagtickgroup.com/satis/web$ ls -a
.  ..  include  index.html  p2  packages.json
Because we are using Plesk, the configuration in `/etc/apache2/` will be overridden by `/etc/apache2/plesk.conf.d/vhosts/`. So, we will need to replicate from satis.flagtickgroup.com.conf to `etc/apache2/plesk.conf.d/vhosts/`.
/etc/apache2/plesk.conf.d/vhosts$ ls -a
.                       satis.flagtickgroup.com.conf
..                      nano.save
» satis.flagtickgroup.com.conf
<VirtualHost 172.26.1.162:7081 >
        ServerName "satis.flagtickgroup.com"
        ServerAlias "www.satis.flagtickgroup.com"
        ServerAlias "ipv4.satis.flagtickgroup.com"
        UseCanonicalName Off

        CustomLog /var/www/vhosts/system/satis.flagtickgroup.com/logs/access_log plesklog
        ErrorLog "/var/www/vhosts/system/satis.flagtickgroup.com/logs/error_log"

        DocumentRoot "/var/www/vhosts/flagtickgroup.com/satis/web"

        <IfModule mod_suexec.c>
             SuexecUserGroup "flagtick" "psacln"
        </IfModule>

        <IfModule mod_userdir.c>
             UserDir "/var/www/vhosts/flagtickgroup.com/web_users/*"
        </IfModule>

        <IfModule mod_sysenv.c>
             SetSysEnv PP_VHOST_ID "1b356638-7b0d-4e96-8ebb-81fadbf4b8da"
        </IfModule>
Note: You will also need to configure `/satis/web` to direct to `index.html` and include `.htaccess file` to manage access to this subdomain alongside `index.html`.

» .htaccess
RewriteEngine On
# Serve static files if they exist
RewriteCond %{REQUEST_FILENAME} -f [OR]
RewriteCond %{REQUEST_FILENAME} -d
RewriteRule ^ - [L]
# Route all other requests to index.html
RewriteRule ^ index.html [L]
After that, you can proceed to access https://satis.flagtickgroup.com/ again to observe how Satis displays all the repositories.

Beside, allow the packages.json file to load alongside index.html, you need to configure your web server to serve both files. Navigate to satis.flagtickgroup.com, then go to Hosting & DNS and select Apache & nginx. You can establish the necessary configurations here.
» Additional Apache directives
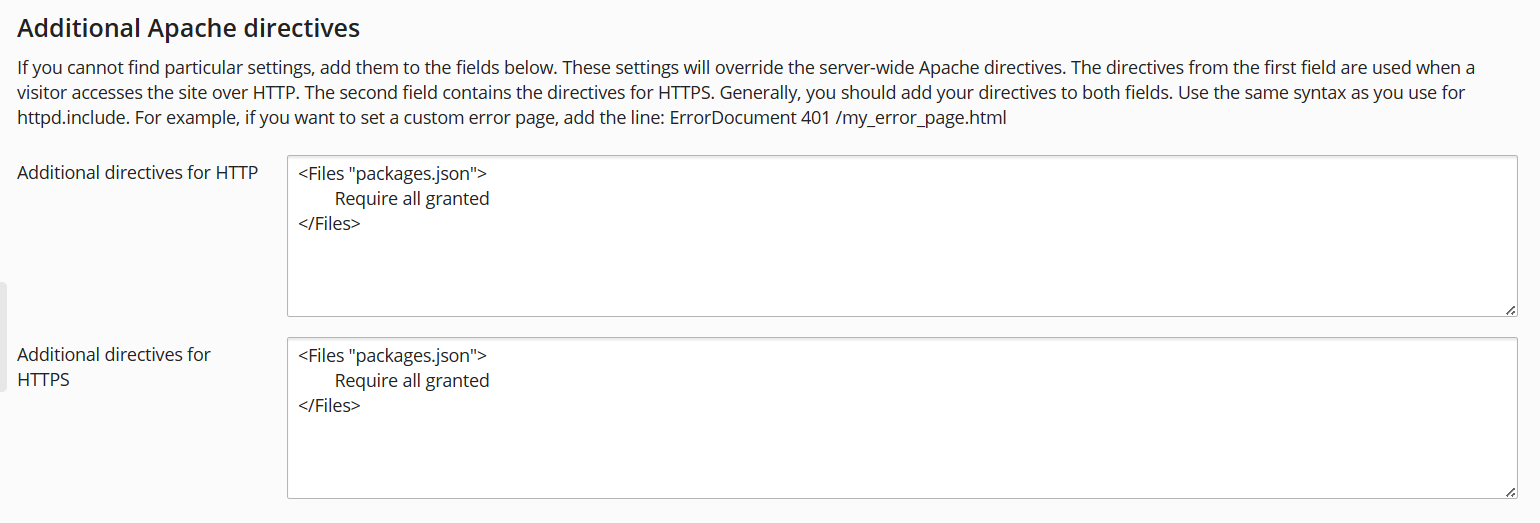
» Additional nginx directives

In the next section, we will explore how to add your package/module to your project using the `composer.json` file and install it with the composer tool. Additionally, we will set up simple script to automatically update your changes on the VCS Server.
IV. Package Installation and Cron Job Setup
Composer initially checks the `/packages.json` file to gather information about available packages, their versions, and their dependencies when resolving dependencies or fetching packages.
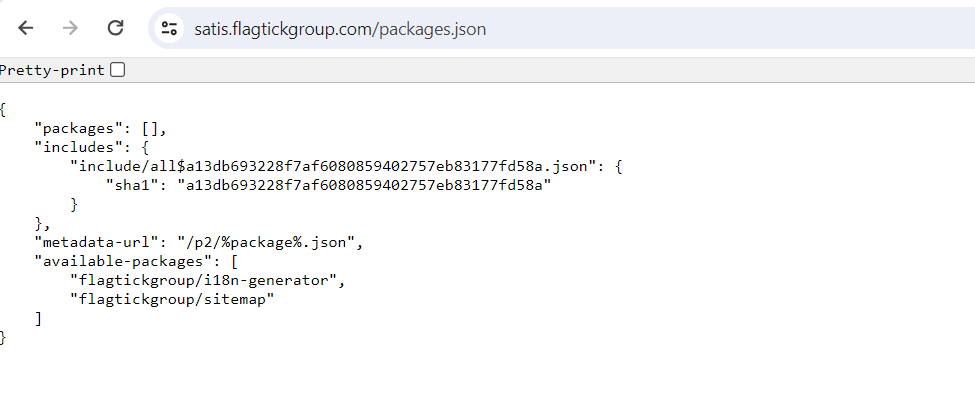
As you can see here, the file serves as the primary index file that lists all the available packages in the repository. Add the following script to your `composer.json` in your Laravel project. This script will define the scope for composer to search for packages in both Packagist and your custom repository.
"repositories": [
    {
        "type": "composer",
        "url": "https://packagist.org"
    },
    {
        "type": "composer",
        "url": "https://satis.flagtickgroup.com"
    }
],
Note: The url `https://packagist.org` is not necessary to include in composer.json. By default, composer will fetch packages from the Packagist website.
Then install your package using composer. Open the terminal and type:
composer require flagtickgroup/sitemap or composer require flagtickgroup/sitemap:*
composer require flagtickgroup/i18n-generator or composer require flagtickgroup/i18n-generator:*
Satis serves as static composer repository generator. This implies that whenever there is a change in your code on the VCS server, you must rebuild your satis.json. To simplify this process, we will create a script to execute the command `php bin/satis build satis.json web` for rebuilding.
/var/www/vhosts/flagtickgroup.com/satis$ touch script.php
/var/www/vhosts/flagtickgroup.com/satis$ sudo cat script.php
<?php
$command = 'php bin/satis build satis.json web';
shell_exec($command);
?>
Next, log in to Plesk and go to satis.flagtickgroup.com subdomain. Use the Schedule a Task option to set up running a PHP script. Point it to the `script.php` file.

V. Conclusion
In the article, we have explored how to establish a private Packagist using Satis for self-hosting on your server. This setup empowers you to efficiently manage and share repositories for PHP projects via Composer. Throught the article that offers comprehensive guidance, covering everything from local setup to deployment on a remote server. If you encounter any issues while implementing the steps outlined in this guide, feel free to reach out by leaving a comment below for assistance.
VI. Video