If you use Git and need to upload your files to an FTP server, Git-ftp can save you time and bandwidth by only uploading the files that have changed since the last commit. To follow along with this article, it's recommended that you have a basic understanding of Git. With that said, let's get started!
Before we begin, make sure you have the following prerequisites:
- Fundamental knowledge of Git commands
- Account registered on Service Hosting
- Available project on your local machine
In this guide, we will explore Git FTP and how to deploy a website to Shared Hosting. Additionally, to help you follow along with the steps, you can clone my GitHub repository. Here's an overview of what we'll cover:
- Configuring Your FTP Client
- Configuring Git FTP
- Developing Your Website
- Conclusion
I. Configuring Your FTP Client
As you may know FTP client is a powerful tool that offers various useful functionalities, such as enabling you to upload files to a server, download files from a server to your device, and manage files stored on your web server.
Next, navigate to your cPanel hosting dashboard and create an FTP account that is linked to the source code for the selected domain name. For this guide, we will use `expeshop.com` as the default selection.
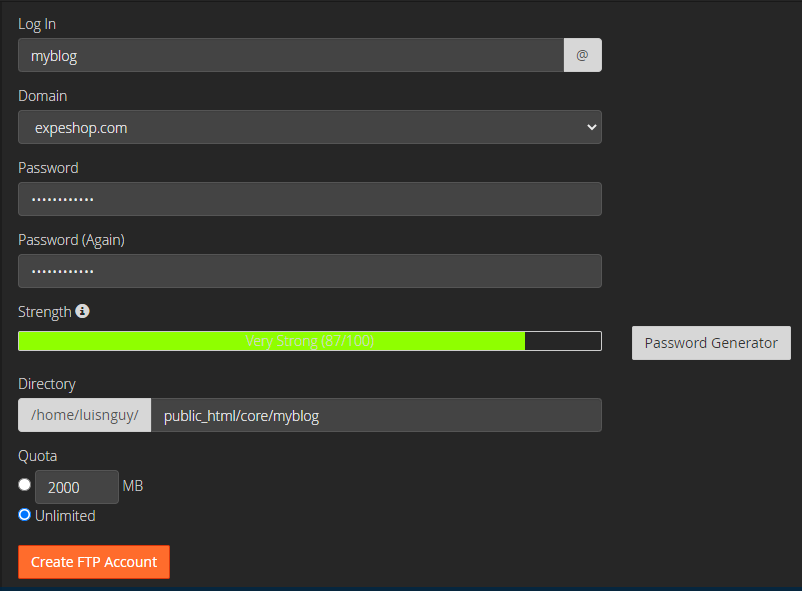
As you can see in the screenshot above, the username is `[email protected]` and the password is obscured by ܀܀܀܀܀܀܀܀܀܀܀܀ symbols. To ensure that the new account functions properly, you need to download and install FileZilla on your computer.
It's worth noting that there are two versions of FileZilla - one for the client and one for the server. In this case, we'll opt for the FileZilla Client as it aligns with our specific requirements.

Once you have successfully installed FileZilla, you can fill in the necessary parameters, such as Host, Username, and Password, using the information available on the cPanel dashboard.

Upon clicking the `Quickconnect` button, a connection will be established between the local and remote repositories. If the status reads 'SUCCESS', it indicates that your FTP account has been set up accurately.
II. Configuring Git FTP
Firstly, you need to install the Git tool on your machine by visiting the official page, which you can find here. Once you have installed Git successfully, run it in your terminal or Git Bash to check the version.
vuongluis@VUONGLUIs MINGW64 ~/Desktop/myblog
$ git --version
git version 2.31.1.windows.1
To proceed, please go to your project folder and set up the local repository using the following command:
vuongluis@VUONGLUIs MINGW64 ~/Desktop/myblog
$ git init
Initialized empty Git repository in C:/Users/vuongluis/Desktop/myblog/.git/
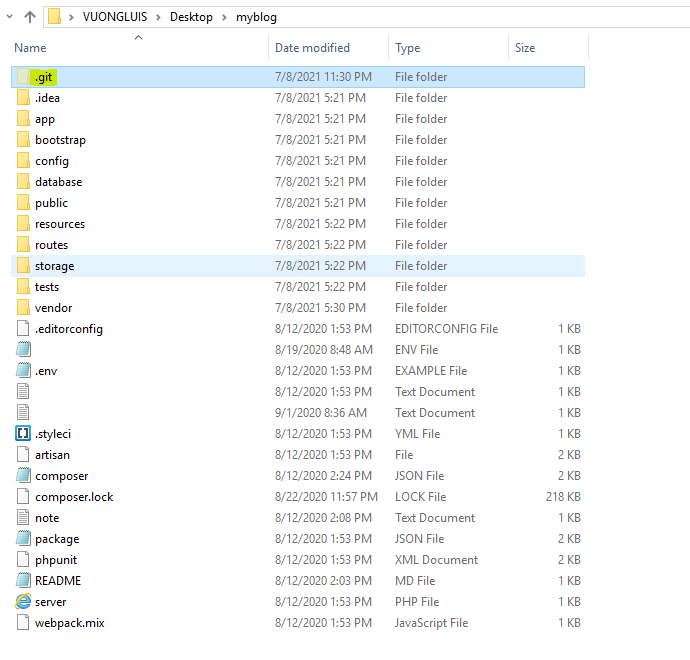
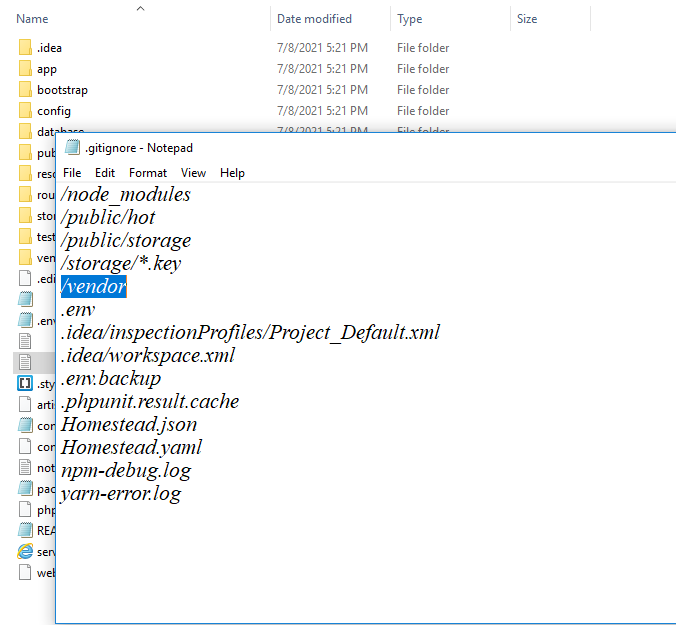
Our current folder structure looks like this:
After making the necessary changes, you should add and commit them to the local branch on your machine.
vuongluis@VUONGLUIs MINGW64 ~/Desktop/myblog (master)
$ git add .
$ git commit -m "Initialize project"
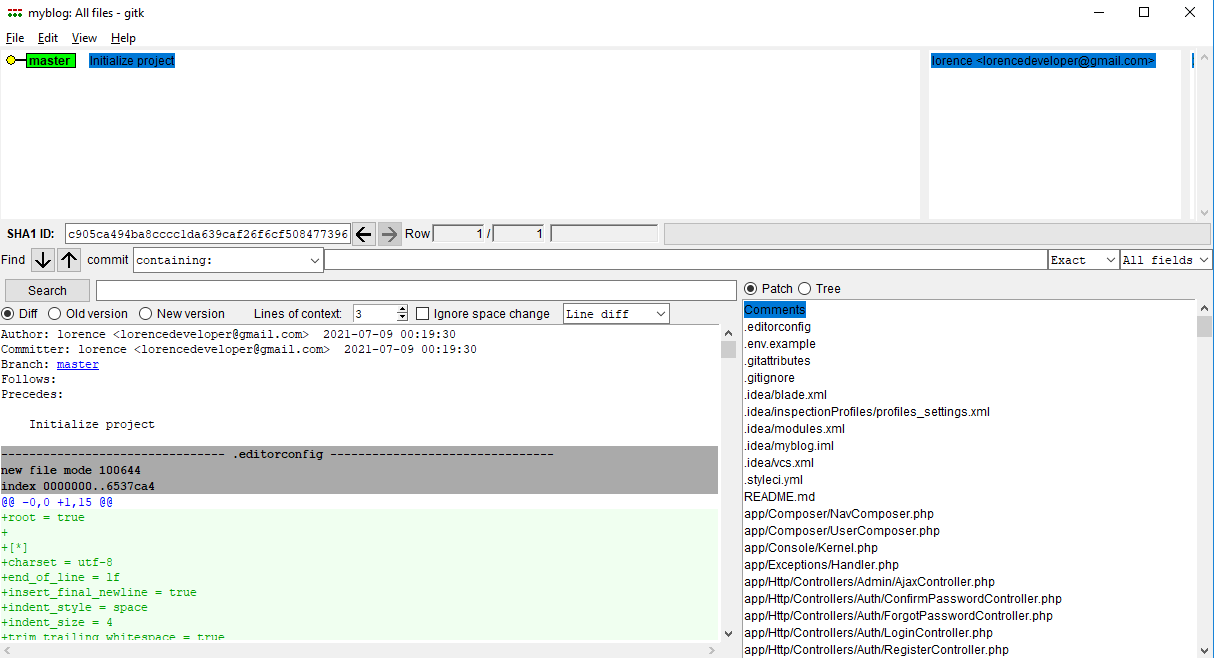
$ gitk
By committing your code, the `gitk` command will present the commit message and the relevant branch that was previously worked on. This is a useful way to track the history of your local repository.
The FTP account mentioned earlier will be utilized by our git configuration, which will integrate with the following:
vuongluis@VUONGLUIs MINGW64 ~/Desktop/myblog (master)
$ git config git-ftp.user [email protected]
$ git config git-ftp.url *******************
$ git config git-ftp.password
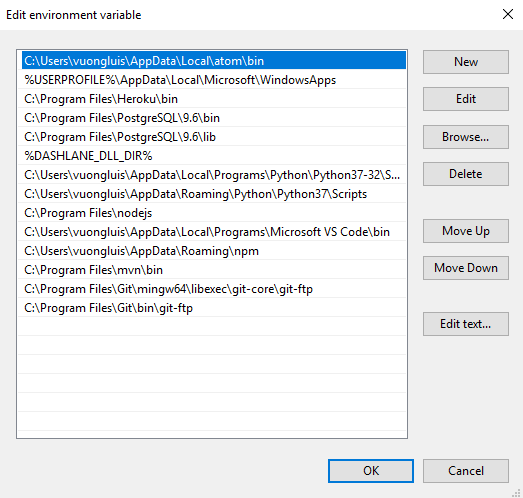
To proceed, you should download the Git-ftp package from its GitHub page, which was created by git-ftp. In addition, git-ftp must be added to the Git installation path on Windows.
C:\Program Files\Git\bin\git-ftp
C:\Program Files\Git\mingw64\libexec\git-core\git-ftp
If `git-ftp` fails to work on your machine, it may be necessary to add it to the path environment variable in Windows. This can be accomplished by following the steps outlined below:
Once `git-ftp` has been installed, you can confirm that it is functioning properly by checking the syntax shown below:
vuongluis@VUONGLUIs MINGW64 ~/Desktop/myblog (master)
$ git-ftp
git-ftp <action> [<options>] [<url>]
The first step is to add an FTP account to the `git-ftp` configuration, including the URL, username, and password. This can be done by following the instructions provided below:
vuongluis@VUONGLUIs MINGW64 ~/Desktop/myblog (master)
$ git config git-ftp.url
ftp.flagtickgroup.com
$ git config git-ftp.user
[email protected]
$ git config git-ftp.password
****************
To proceed, you should access the root directory of your project and open the terminal or command prompt. Once you've done that, execute the following command:
vuongluis@VUONGLUIs MINGW64 ~/Desktop/myblog (master)
$ git-ftp init
1543 files to sync:
[1 of 1543] Buffered for upload '.editorconfig'.
...
[1543 of 1543] Buffered for upload 'webpack.mix.js'.
Uploading ...
Last deployment changed from  to c905ca494ba8cccc1da639caf26f6cf508477396.
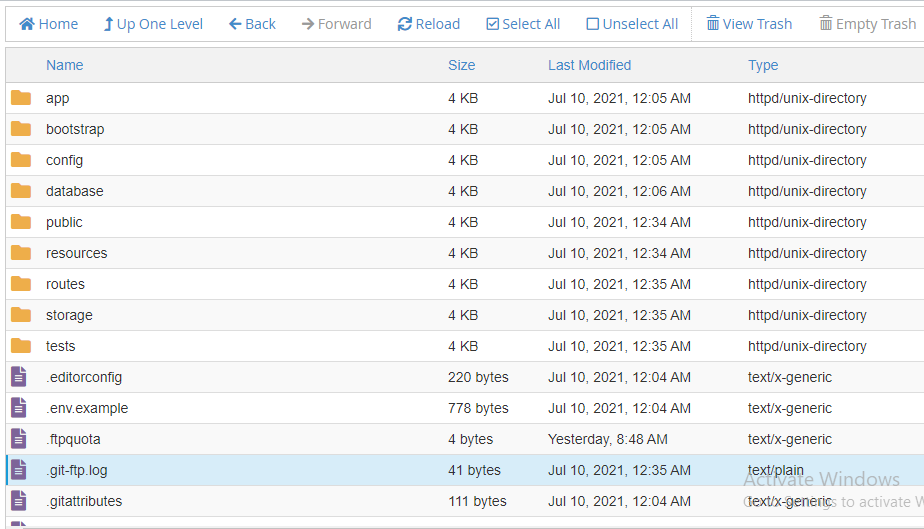
Afterward, you can verify that the myblog folder exists in your Shared Hosting account. If a file named `.git-ftp.log` has been created, it signifies that the code has been successfully pushed.
If the manipulation was successful, you can utilize the `git-ftp` log command to review the commit message associated with the deployment. For future deployments, you can follow the same steps mentioned above.
vuongluis@VUONGLUIs MINGW64 ~/Desktop/myblog (master)
$ git-ftp log
commit c905ca494ba8cccc1da639caf26f6cf508477396 (HEAD -> master)
Author: lorence <[email protected]>
Date:   Fri Jul 9 00:19:30 2021 +0700
    Initialize project
III. Developing Your Website
Deployment is a crucial process that requires careful review and preparation before publishing. In this section, we will explain how to safely and effectively push a project to website server hosting.
Typically, we do not push large files as it may take a long time and encounter roadblocks during processing. For instance, the vendor folder contains dependencies generated from `packages.json`. To skip this folder, we can use .gitignore and manually push it using an FTP client.
Next, you'll need to modify the `note.txt` file to include a new feature for the application. Once you've made the changes, it's time to deploy the feature to the server. Follow these step-by-step instructions:
vuongluis@VUONGLUIs MINGW64 ~/Desktop/myblog (master)
$ git status
On branch master
Changes not staged for commit:
  (use "git add <file>..." to update what will be committed)
  (use "git restore <file>..." to discard changes in working directory)
        modified:   note.txt
no changes added to commit (use "git add" and/or "git commit -a")

vuongluis@VUONGLUIs MINGW64 ~/Desktop/myblog (master)
$ git add "note.txt"

vuongluis@VUONGLUIs MINGW64 ~/Desktop/myblog (master)
$ git commit -m "Adjust file note.txt"
[master ad822af] Adjust file note.txt
 1 file changed, 1 insertion(+), 1 deletion(-)

vuongluis@VUONGLUIs MINGW64 ~/Desktop/myblog (master)
$ git-ftp push
1 file to sync:
[1 of 1] Buffered for upload 'note.txt'.
Uploading ...
Last deployment changed from c905ca494ba8cccc1da639caf26f6cf508477396 to ad822afe27d9a5991b85e74eecc158f5601defdc.

vuongluis@VUONGLUIs MINGW64 ~/Desktop/myblog (master)
$ git-ftp log
commit ad822afe27d9a5991b85e74eecc158f5601defdc (HEAD -> master)
Author: lorence <[email protected]>
Date:   Sat Jul 10 16:33:10 2021 +0700

    Adjust file note.txt

commit c905ca494ba8cccc1da639caf26f6cf508477396
Author: lorence <[email protected]>
Date:   Fri Jul 9 00:19:30 2021 +0700

    Initialize project
IV. Conclusion
This article covers the process of deploying a website to server hosting, whether it's Shared Hosting, Cloud Hosting, or VPS. Git-ftp is a powerful tool that simplifies the deployment process and makes it easy for developers. It's particularly helpful for those who prefer the old way of using FTP Client. If you encounter any issues while following our guide, please leave a comment below and we'll be happy to assist you.
V. Video