Redmine stands as a versatile and robust open-source project management platform crafted using Ruby on Rails. It is particularly favored by startups for its adept handling of various project management tasks including overseeing multiple projects, issue and bug tracking, document and file management, time tracking, and much more.
This guide aims to walk you through the process of deploying Redmine on a VPS operating on Ubuntu. Additionally, we'll implement a proxy setup to seamlessly route the Rails server to a subdomain, enabling convenient access to the Redmine interface via your web browser.
Here is an overview of what we'll cover:
- Setup Ruby/Rails on Linux
- Setup Database Management System
- Install Redmine On Ubuntu
- Configuring Redmine to Run as a Service
- Subdomain Load Redmine Server via Proxy Pass
I. Setup Ruby/Rails on Linux
As we start setting up Ruby/Rails on Linux, our first step is to install important stuff that Ruby and Rails need. Without them, Redmine might not work well for managing projects.
sudo apt install curl zlib1g-dev build-essential libssl-dev libyaml-dev sqlite3 libxml2-dev libxslt1-dev libcurl4-openssl-dev software-properties-common libffi-dev
You can verify the installation status of packages on your Ubuntu system using the dpkg command. For example, to check if packages like curl and `zlib1g-dev` are installed, you can use the command: dpkg -s curl zlib1g-dev.
dpkg -s curl zlib1g-dev
After installing the necessary dependencies, you can verify the versions of Ruby and Rails by executing the following commands:
ruby -v
ruby 2.7.0p0 (2019-12-25 revision 647ee6f091) [x86_64-linux-gnu]
rails -v
Rails 7.0.4.3
The `Gemfile` and `Gemfile.lock` are integral components within the Ruby on Rails ecosystem. The Gemfile serves as a manifest listing the required gems for a Rails application, while the Gemfile.lock is automatically generated by Bundler, the package manager utilized by Ruby on Rails.
To ensure your gem dependencies are up-to-date and to install bundler, you can execute the following commands:
sudo gem update
sudo gem install bundler
Would you like to visualize how to use gem? Let us visit the Redmine source code here and observe the Gemfile.
    gem 'rails', '6.1.7.3'
	gem 'rouge', '~> 4.1.0'
	gem 'request_store', '~> 1.5.0'
	gem 'mini_mime', '~> 1.1.0'
	gem "actionpack-xml_parser"
	gem 'roadie-rails', '~> 3.0.0'
	gem 'marcel'
	gem 'mail', '~> 2.8.1'
	gem 'nokogiri', '~> 1.14.0'
	gem 'i18n', '~> 1.13.0'
	gem 'rbpdf', '~> 1.21.1'
	gem 'addressable'
	gem 'rubyzip', '~> 2.3.0'
If you find that the `mysql2` dependency is missing in your `Gemfile`, you can resolve this issue by installing it using the following command:
sudo gem install mysql2
To ensure the `mysql2` gem is included in your `Gemfile`, open the file in a text editor and verify that the following line is present:
    gem 'rails', '6.1.7.3'
	gem 'rouge', '~> 4.1.0'
	gem 'request_store', '~> 1.5.0'
	gem 'mini_mime', '~> 1.1.0'
	gem "actionpack-xml_parser"
	gem 'roadie-rails', '~> 3.0.0'
	gem 'marcel'
    gem "mysql2"
	gem 'mail', '~> 2.8.1'
	gem 'nokogiri', '~> 1.14.0'
	gem 'i18n', '~> 1.13.0'
	gem 'rbpdf', '~> 1.21.1'
	gem 'addressable'
	gem 'rubyzip', '~> 2.3.0'
Note: You can open the Gemfile in text editor using the command `nano Gemfile`.
In Ruby/Rails applications, the bundle install command is crucial. It is employed to install all the necessary gems (Ruby libraries) listed in the Gemfile, ensuring that the application has the required dependencies to function properly. Additionally, running bundle update helps keep these gems up-to-date by fetching the latest versions available. The Gemfile acts as a roadmap, specifying the required gems along with their versions essential for the application's smooth operation.
bundle install && bundle update
In this section, make sure to run bundle install to properly set up your Ruby/Rails app. Next, we will delve into configuring the database management to connect with the Redmine application.
II. Setup Database Management System
MariaDB is a community-driven fork of the popular MySQL database management system, known for its widespread use and as a free and open-source relational database management system. Therefore, let's proceed by installing the MariaDB database management system on our Linux-based operating system using the command:
sudo apt install mariadb-server
To verify whether the package has been installed successfully, you can use the following command:
sudo systemctl status mariadb || sudo mysql --version
Next, we will proceed by setting up a new MySQL/MariaDB database named `admin_redmine` along with a user named `adminRedmine`. This user will be granted full privileges over the `admin_redmine` database, using the password `xxxxxx`.
sudo mysql -u root -p
mysql> CREATE DATABASE admin_redmine CHARACTER SET utf8mb4 COLLATE utf8mb4_unicode_ci;
mysql> CREATE USER 'adminRedmine'@'localhost' IDENTIFIED BY 'xxxxxx';
mysql> GRANT ALL PRIVILEGES ON admin_redmine.* TO 'adminRedmine'@'localhost';
mysql> FLUSH PRIVILEGES;
mysql> EXIT;
When you run the command SHOW DATABASES; in the MySQL command-line interface, it will present a comprehensive list of all databases currently accessible within the MySQL server environment.
ubuntu@flagtickhostwebsite:~$ sudo mysql -u root -p
Enter password:
Welcome to the MariaDB monitor.  Commands end with ; or \g.
Your MariaDB connection id is 292408
Server version: 10.3.39-MariaDB-0ubuntu0.20.04.2 Ubuntu 20.04

Copyright (c) 2000, 2018, Oracle, MariaDB Corporation Ab and others.

Type 'help;' or '\h' for help. Type '\c' to clear the current input statement.

MariaDB [(none)]> SHOW DATABASES;
+--------------------+
| Database           |
+--------------------+
| admin_flagtick     |
| admin_redmine      |
| apsc               |
| information_schema |
| mysql              |
| performance_schema |
| phpmyadmin         |
| psa                |
| redmine_default    |
| roundcubemail      |
+--------------------+
10 rows in set (0.001 sec)

MariaDB [(none)]> Ctrl-C -- exit!
Aborted
In addition to the SHOW DATABASES; command, you can perform various other operations within the MySQL command-line interface. Some commonly used commands include:
// Create Database
CREATE DATABASE database_name;

// Select a specific database to work with
USE database_name;

// Drop Database
DROP DATABASE database_name;

// Show tables
SHOW TABLES;

// Display the structure of specific table
DESCRIBE table_name;

// Retrieve data from one or more tables
SELECT * FROM table_name;
To access the MySQL server as the user adminRedmine, open your terminal and enter the following command:
mysql -u adminRedmine -p
We methods can be used to start the Redmine server:
- Web Servers - using libapache2-mod-passenger Apache module.
- Application Servers - using sudo bundle exec rails server -e production command.
Here, we will focus on using Application Servers to launch the Redmine server. This is because we need to attach the subdomain `redmine.flagtickgroup.com`, which has been created and managed by the Plesk panel. It can be challenging to install the libapache2-mod-passenger Apache module on Plesk for Linux, which uses the Apache HTTP Server.
III. Install Redmine On Ubuntu
To get different versions of the Redmine project management software, visit https://www.redmine.org/releases/. It's best to install a version newer than 5.0.0 to avoid errors from older versions. For instance, to install version 5.0.5, use these commands:
wget https://www.redmine.org/releases/redmine-5.0.5.tar.gz
tar xzf redmine-5.0.5.tar.gz
sudo cp -r redmine-5.0.5 redmine
sudo rm -rf redmine-5.0.5
sudo rm -rf redmine-5.0.5.tar.gz
In some cases, it can be assumed that Redmine has already been installed on your local or VPS. In such cases, you can check the current version of Redmine using the following command:
cat lib/redmine/version.rb
Use the ls -l command to list the owner and group of the directory:
ls -l /var/www/vhosts/flagtickgroup.com/redmine/
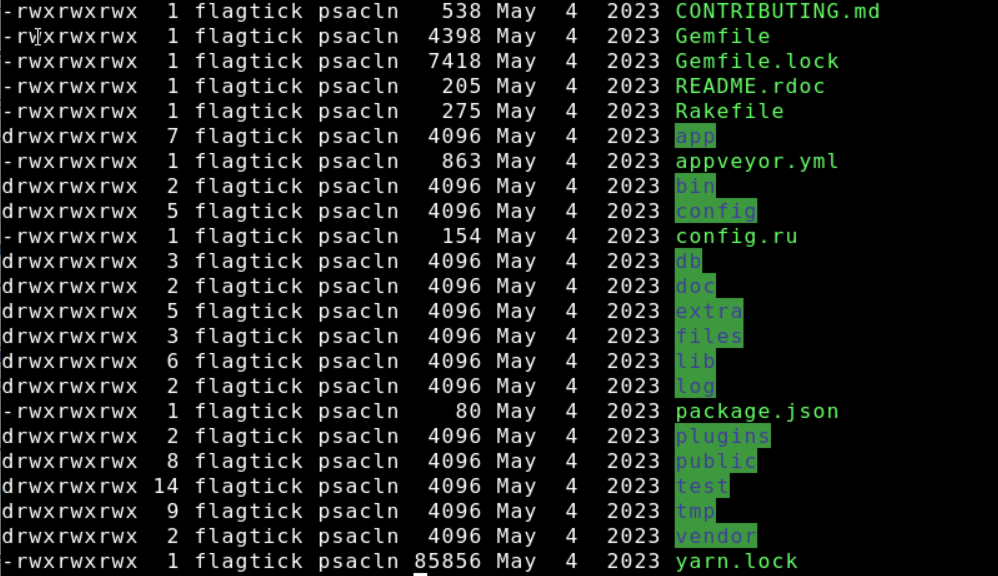
Note: When you run the command, it will display a list of files and directories in the specified directory along with their respective owner and group.
To ensure that the Apache user has proper access permissions to the Redmine directory, execute the following command:
sudo chown -R <username>:<usergroup> /var/www/vhosts/flagtickgroup.com/redmine
Before executing bundle install --without development test, ensure to configure the `database.yml` file in Redmine. You can do this by copying the example configuration file and editing it as needed. Run the following commands to achieve this:
sudo cp -r config/database.yml.example config/database.yml
sudo nano database.yml
» database.yml
production:
  adapter: mysql2
  database: admin_redmine
  host: localhost
  username: adminRedmine
  password: xxxxxxxxxx
  # Use "utf8" instead of "utfmb4" for MySQL prior to 5.7.7
  encoding: utf8mb4

development:
  adapter: mysql2
  database: admin_redmine
  host: localhost
  username: adminRedmine
  password: xxxxxxxxxx
  # Use "utf8" instead of "utfmb4" for MySQL prior to 5.7.7
  encoding: utf8mb4

# Warning: The database defined as "test" will be erased and
# re-generated from your development database when you run "rake".
# Do not set this db to the same as development or production.
test:
  adapter: mysql2
  database: admin_redmine
  host: localhost
  username: adminRedmine
  password: xxxxxxxxxx
...
Install the required gems using Bundler by executing the following command:
bundle install --without development test
Note: In certain cases, we may need to use `sudo gem <package>` to install essential packages if they are not already installed.
To generate a new secret token in a Rails application, you can run the following command in the terminal:
bundle exec rake generate_secret_token (If it is not working, let use use sudo)
In Rails application like Redmine, database migrations are typically performed using the migration tool. Execute the following command to run the migrations:
sudo bundle exec rake db:migrate
To apply database changes to a production server, use the following command:
RAILS_ENV=production bundle exec rake db:migrate || bundle exec rake db:migrate RAILS_ENV=production
.Making sure Redmine works correctly includes loading default data after setting up the database structure but before starting to use the system. Use this command to add necessary default information:
sudo bundle exec rake redmine:load_default_data
Run the Rails application server in production mode and optimize it for a live environment with appropriate settings and security measures, execute the following commands in the directory `/var/www/vhosts/flagtickgroup.com/redmine`:
sudo chmod -R 0777 .bundle/
sudo chmod -R 0777 Gemfile.lock
bundle exec rails server -e production (If it is not working, let us use sudo)

Check if port 3000 is already in use and, if needed, free it up for the Rails application server, you can use the following commands:
sudo lsof -i :3000
sudo kill <pid>
Verify whether the Redmine server is running, you can use the following common curl commands, which involve sending an HTTP request:
curl -I 0.0.0.0:3000
curl --verbose 0.0.0.0:3000
IV. Configuring Redmine to Run as a Service
First and foremost, check if the redmine.service file already exists in the directory `/etc/systemd/system` on a Linux system, let us begin by listing systemd unit files and related services.
/etc/systemd/system$ ls -a
 .                                        sleep.target.wants
 ..                                      'snap-amazon\x2dssm\x2dagent-4046.mount'
 bind9.service                           'snap-amazon\x2dssm\x2dagent-6312.mount'
 cloud-final.service.wants                snap-core18-2714.mount
 cloud-init.target.wants                  snap-core18-2721.mount
 dbus-org.freedesktop.resolve1.service    snap-core20-1828.mount
 dbus-org.freedesktop.timesync1.service   snap-core20-1852.mount
 default.target.wants                     snap-lxd-21835.mount
 elasticsearch.service                    snap-lxd-24061.mount
 emergency.target.wants                   snap-snapd-18596.mount
 final.target.wants                       snap-snapd-18933.mount
 getty.target.wants                       snap.amazon-ssm-agent.amazon-ssm-agent.service
 graphical.target.wants                   snap.lxd.activate.service
 iscsi.service                            snap.lxd.daemon.service
 mdmonitor.service.wants                  snap.lxd.daemon.unix.socket
 multi-user.target.wants                  snapd.mounts.target.wants
 multipath-tools.service                  sockets.target.wants
 mysql.service                            [email protected]
 mysqld.service                           sshd.service
 network-online.target.wants              sysinit.target.wants
 open-vm-tools.service.requires           syslog.service
 paths.target.wants                       timers.target.wants
 plesk-ssh-terminal.service.d             vmtoolsd.service
 rescue.target.wants
» redmine.service
[Unit]
Description=Redmine Rails Server
[Service]
Type=simple
User=ubuntu
WorkingDirectory=/var/www/vhosts/flagtickgroup.com/redmine
ExecStart=/bin/bash -lc 'sudo bundle exec rails server -e production'
Restart=always

[Install]
WantedBy=multi-user.target
Reload the systemd daemon to load the new service and enable it to start at boot time by executing the following commands:
sudo systemctl daemon-reload
sudo systemctl enable redmine.service
sudo systemctl start redmine.service
After starting the service, you can check its status to see if it is running properly. Use the following command to check the status:
sudo systemctl status redmine.service
● redmine.service - Redmine Rails Server
     Loaded: loaded (/etc/systemd/system/redmine.service; enabled; vendor preset: enabled)
     Active: active (running) since Sun 2024-03-24 08:27:11 UTC; 2s ago
   Main PID: 1226988 (sudo)
      Tasks: 3 (limit: 4686)
     Memory: 93.0M
     CGroup: /system.slice/redmine.service
             ├─1226988 sudo bundle exec rails server -e production
             └─1226996 /usr/bin/ruby2.7 bin/rails server -e production


Mar 24 08:27:11 flagtickhostwebsite systemd[1]: Started Redmine Rails Server.
Mar 24 08:27:11 flagtickhostwebsite sudo[1226988]:   ubuntu : TTY=unknown ; PWD=/var/www/>
Mar 24 08:27:11 flagtickhostwebsite sudo[1226988]: pam_unix(sudo:session): session opened>
Mar 24 08:27:13 flagtickhostwebsite bash[1226996]: => Booting WEBrick
Mar 24 08:27:13 flagtickhostwebsite bash[1226996]: => Rails 6.1.7.2 application starting >
Mar 24 08:27:13 flagtickhostwebsite bash[1226996]: => Run `bin/rails server --help` for m>
V. Subdomain Load Redmine Server via Proxy Pass
First and foremost, enable certain modules required for proxying requests to another server from Apache server. Hence, you need to configure your web server to proxy the requests to the Rails server.
sudo a2enmod proxy
sudo a2enmod proxy_http
sudo a2enmod proxy_balancer
sudo a2enmod lbmethod_byrequests
In Apache web server configuration on Ubuntu, the directories `sites-available` and `sites-enabled` are used to manage virtual hosts, which allow you to host multiple websites on a single server. In Plesk panel, domain-specific Apache configurations are managed through the Plesk interface, and they are stored in a distinct location compared to the default Apache configuration files found in `/etc/apache2/sites-available`.
- `sites-available`: Holds config files for virtual hosts (.conf), defining domain names and document roots.
- `sites-enabled`: Stores symbolic links to enabled virtual host configs from `sites-available`. Apache uses this directory to determine active virtual hosts, simplifying enable/disable actions without altering original files.
 $ ls - /etc/apache2/
 apache2.conf                             conf-available   magic            modsecurity.d   sites-available
'apache2.conf.saved_by_psa.12.05;13:10'   conf-enabled     mods-available   plesk.conf.d    sites-enabled
'apache2.conf.saved_by_psa.12.09;07:15'   envvars          mods-enabled     ports.conf
- `sudo a2ensite`: This command is used to enable Apache virtual host configuration files located in the sites-available directory. It creates a symbolic link in the sites-enabled directory, enabling the specified virtual host configuration.
- `sudo a2enmod`: This command is used to enable Apache modules. It creates a symbolic link in the mods-enabled directory, enabling the specified Apache module.
Create virtual host for the subdomain in Apache by creating file in `/etc/apache2/sites-available/redmine.flagtickgroup.com.conf` directory with the following:
<VirtualHost *:80>
    ServerName redmine.flagtickgroup.com
    DocumentRoot /var/www/vhosts/flagtickgroup.com/redmine/public
    <Directory /var/www/vhosts/flagtickgroup.com/redmine/public>
       Options FollowSymLinks
       AllowOverride None
       Require all granted
    </Directory>
    ErrorLog ${APACHE_LOG_DIR}/redmine_error.log
    CustomLog ${APACHE_LOG_DIR}/redmine_access.log combined
</VirtualHost>
Enable the virtual host by creating a symbolic link in the `/etc/apache2/sites-enabled/` directory:
sudo ln -s /etc/apache2/sites-available/redmine.flagtickgroup.com.conf /etc/apache2/sites-enabled/
sudo a2ensite redmine.flagtickgroup.com.conf
The folder `/var/www/vhosts/system/` is typically created and managed by hosting control panels like Plesk to organize and manage the configurations and files for domains and subdomains hosted on the server.
$ ls -a var/www/vhosts/system
.  ..  commerce.flagtickgroup.com  flagtickgroup.com  redmine.flagtickgroup.com
Navigate to the file `/var/www/vhosts/system/redmine.flagtickgroup.com/conf/httpd.conf` and use the sudo nano command in Ubuntu to adjust two properties.
#ATTENTION!
#
#DO NOT MODIFY THIS FILE BECAUSE IT WAS GENERATED AUTOMATICALLY,
#SO ALL YOUR CHANGES WILL BE LOST THE NEXT TIME THE FILE IS GENERATED.
#IF YOU REQUIRE TO APPLY CUSTOM MODIFICATIONS, PERFORM THEM IN THE FOLLOWING FILES:
#/var/www/vhosts/system/redmine.flagtickgroup.com/conf/vhost.conf
#/var/www/vhosts/system/redmine.flagtickgroup.com/conf/vhost_ssl.conf
<IfModule mod_ssl.c>

<VirtualHost 172.26.1.162:7081 >
    ServerName "redmine.flagtickgroup.com"
    ServerAlias "www.redmine.flagtickgroup.com"
    ServerAlias "ipv4.redmine.flagtickgroup.com"
    UseCanonicalName Off
    ...
    DocumentRoot "/var/www/vhosts/flagtickgroup.com/redmine/public" <== You should adjust it
    ...
    <Directory /var/www/vhosts/flagtickgroup.com/redmine/public> ... </Directory>  <== You should adjust it
Accessing `/etc/apache2/plesk.conf.d/vhosts` shows Apache configuration files for websites managed by Plesk.
$ ls -a /etc/apache2/plesk.conf.d/vhosts
.   commerce.flagtickgroup.com.conf  nano.save
..  flagtickgroup.com.conf           redmine.flagtickgroup.com.conf
Verify the configuration in the file located at `/etc/apache2/plesk.conf.d/vhosts/redmine.flagtickgroup.com.conf`. Check the following two lines within this file:
DocumentRoot "/var/www/vhosts/flagtickgroup.com/redmine/public"
<Directory /var/www/vhosts/flagtickgroup.com/redmine/public> ... </Directory>
Once all configurations for the `redmine.flagtickgroup.com` subdomain are set up, it is necessary to verify if port 3000 is open and functioning correctly by running the Redmine application. After that, you can check its functionality using the curl command.
$ curl --verbose 0.0.0.0:3000 2>&1 | grep "Redmine"
<title>Redmine</title>
<meta name="description" content="Redmine" />
<link rel="alternate" type="application/atom+xml" title="Redmine: Latest news" href="http:
//0.0.0.0:3000/news.atom" />
<link rel="alternate" type="application/atom+xml" title="Redmine: Activity" href="http://0
.0.0.0:3000/activity.atom" />
<h1>Redmine</h1>
Powered by <a href="https://www.redmine.org/">Redmine</a> © 2006-2023 Jean-Philip
pe Lang
Before proceeding, ensure that you have already set up the subdomain in your Plesk panel. If you are utilizing Cloudflare as a CDN layer, it is neccesary to add an A record for your subdomain, linking it to the corresponding IP address.

Check if domain is using Cloudflare, you can perform DNS lookup for the domain's nameservers and see if they match Cloudflare's nameservers.
nslookup -type=NS redmine.flagtickgroup.com
Running `sudo systemctl restart apache2` restarts the Apache web server, which is necessary to apply any new configurations that have been made.
curl --verbose https://redmine.flagtickgroup.com/404.html
curl --verbose https://redmine.flagtickgroup.com/500.html
Verify the functionality of Redmine pages, you need to access the Redmine server through the configured proxy pass, which uses port 80. This means accessing the server indirectly on port 3000 in the `/var/www/vhosts/system/redmine.flagtickgroup.com/conf/httpd.conf` configuration file.
#DO NOT MODIFY THIS FILE BECAUSE IT WAS GENERATED AUTOMATICALLY,
#SO ALL YOUR CHANGES WILL BE LOST THE NEXT TIME THE FILE IS GENERATED.
#IF YOU REQUIRE TO APPLY CUSTOM MODIFICATIONS, PERFORM THEM IN THE FOLLOWING FILES:
#/var/www/vhosts/system/redmine.flagtickgroup.com/conf/vhost.conf
#/var/www/vhosts/system/redmine.flagtickgroup.com/conf/vhost_ssl.conf
<IfModule mod_ssl.c>

	<VirtualHost 172.26.5.238:7081 >
		ServerName "redmine.flagtickgroup.com"
		ServerAlias "www.redmine.flagtickgroup.com"
		ServerAlias "ipv4.redmine.flagtickgroup.com"
		UseCanonicalName Off
                ProxyPreserveHost On
                ProxyPass / http://localhost:3000/
                ProxyPassReverse / http://localhost:3000/
		CustomLog /var/www/vhosts/system/redmine.flagtickgroup.com/logs/access_ssl_log
plesklog
		ErrorLog "/var/www/vhosts/system/redmine.flagtickgroup.com/logs/error_log"
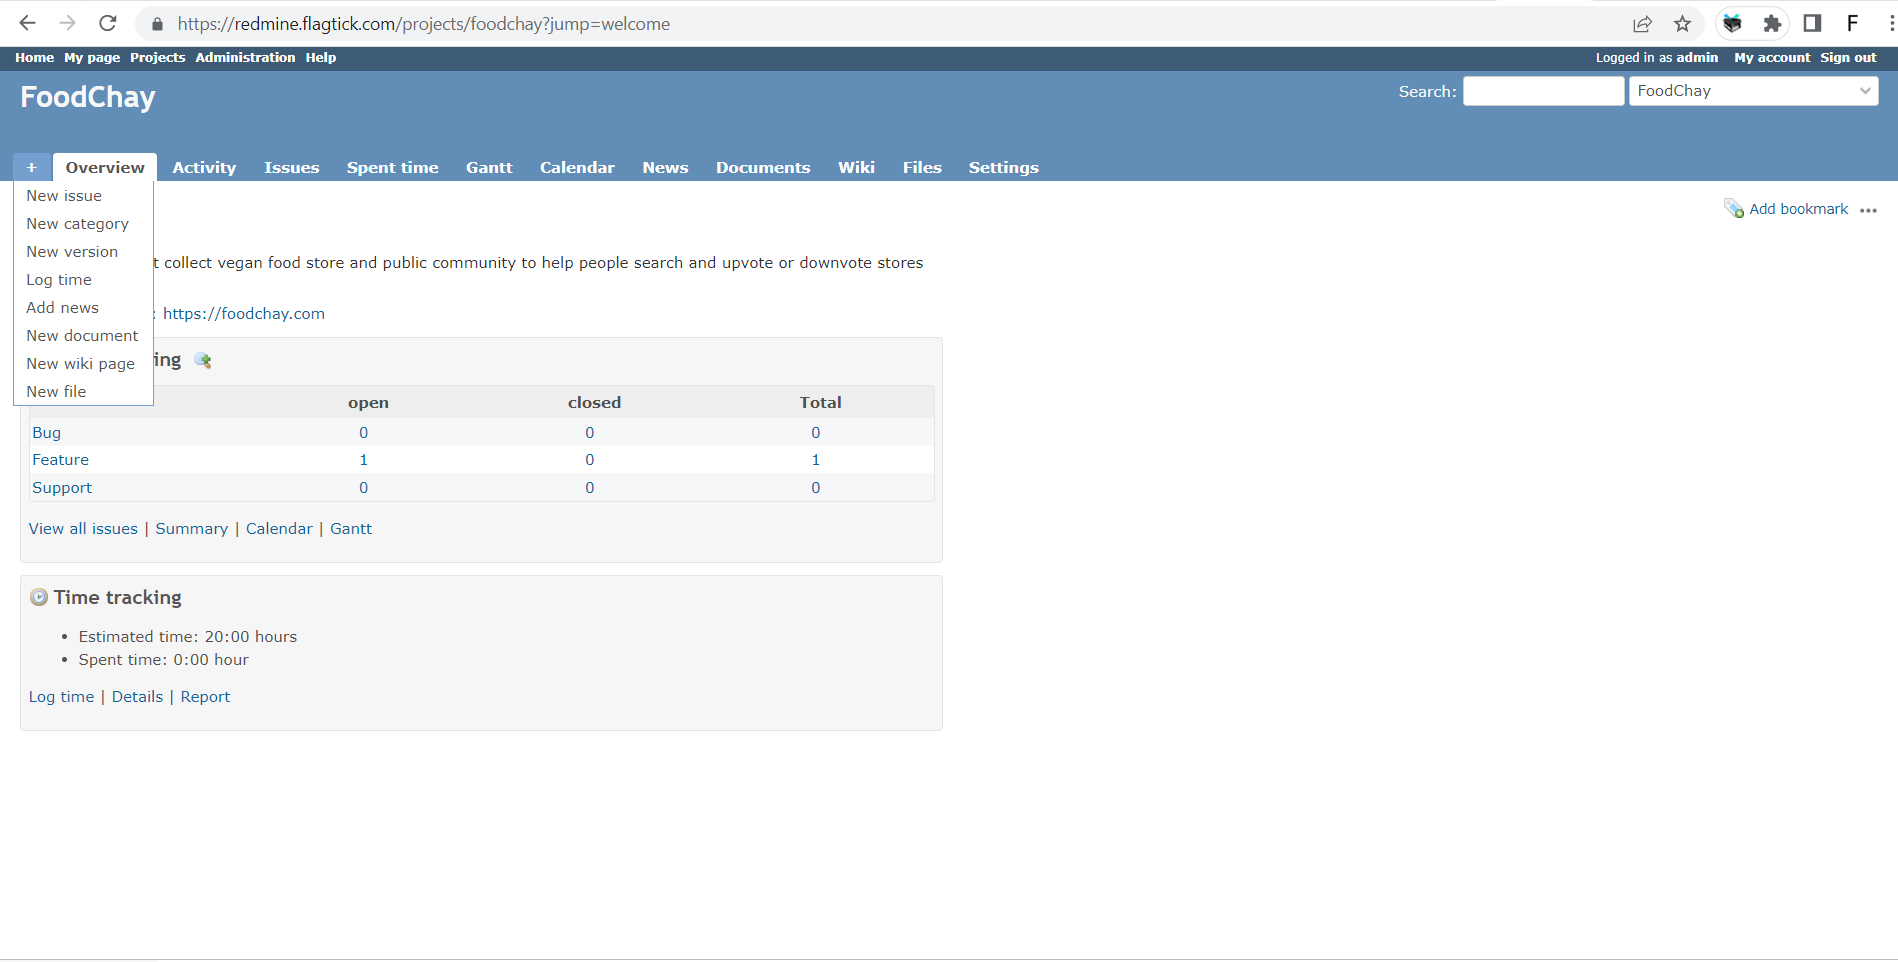
After restarting Apache with `sudo systemctl restart apache2`, check the redmine.flagtickgroup.com subdomain in your browser to ensure Redmine is accessible as expected.
VI. Conclusion
In the article, Installing and setting up Redmine on an Ubuntu VPS with a subdomain can provide a powerful project management tool for development teams. By following the necessary steps to install and configure Redmine, as well as configuring Apache to use a subdomain, developers can easily access Redmine from a dedicated URL. Additionally, Redmine's flexible and customizable features, such as issue tracking, time tracking, and project wikis, make it a popular choice for managing projects and collaborating with team members. With proper maintenance and updates, Redmine can help streamline project workflows and improve team productivity.
VII. Video